Now you won’t be able to use Mouse scroll inside Start Menu which might occur due to a number of reasons such as uninstalled pending updates, unwanted or unused system files and folders saved, not many Start menu items pinned or if the app files and folders are corrupted or missing on the computer. It doesn’t matter what you do but you won’t be able to scroll correctly in the Start Menu, so without wasting any time let’s see how to actually Fix Mouse Scroll doesn’t work in Start Menu on Windows 10 with the help of below-listed troubleshooting guide.
Fix Mouse Scroll doesn’t work in Start Menu on Windows 10
Make sure to create a restore point just in case something goes wrong.
Fix Mouse Scroll doesn’t work in Start Menu on Windows 10 Method 1: Enable Scroll Inactive Windows Method 2: Run SFC and DISM Method 3: Update Mouse Drivers Method 4: Uninstall Mouse Drivers Method 5: Re-install Synaptics
Method 1: Enable Scroll Inactive Windows
1.Press Windows Key + I to open Settings then click on Devices.
2.From the left-hand menu select Mouse. 3.Now make sure to turn ON or enable the toggle for “Scroll inactive windows when I hover over them.“
4.Close everything and reboot your PC to save changes.
Method 2: Run SFC and DISM
1.Press Windows Key + X then click on Command Prompt(Admin).
2.Now type the following in the cmd and hit enter:
3.Wait for the above process to finish and once done restart your PC. 4.Again open cmd and type the following command and hit enter after each one:
5.Let the DISM command run and wait for it to finish. 6. If the above command doesn’t work then try on the below: Note: Replace the C:\RepairSource\Windows with the location of your repair source (Windows Installation or Recovery Disc). 7.Reboot your PC to save changes and see if you’re able to Fix Mouse Scroll doesn’t work in Start Menu.
Method 3: Update Mouse Drivers
1.Press Windows Key + R then type devmgmt.msc and hit Enter to open Device Manager.
2.Expand Mice and other pointing devices and then right-click on your device and select Update driver.
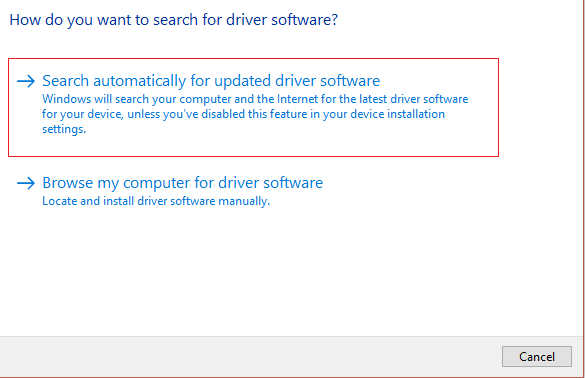
3.First, select “Search automatically for updated driver software” and wait for it to automatically install latest drivers.
4.If the above fails to fix the issue then again follow the above steps except but on the Update driver screen this time choose “Browse my computer for driver software.“
5.Next, select “Let me pick from a list of available drivers on my computer.“
6.Select the appropriate driver and click Next to install it. 7.Reboot your PC to save changes. 8.If you are still facing the issue then on the select driver page select “PS/2 Compatible Mouse” driver and click Next.
9.Again check if you are able to Fix Mouse Scroll doesn’t work in Start Menu on Windows 10.
Method 4: Uninstall Mouse Drivers
1.Press Windows Key + R then type devmgmt.msc and hit Enter to open Device Manager.
2.Expand Mice and other pointing devices and then right-click on your device and select Uninstall.
3.If asked for confirmation select Yes. 4.Reboot your PC to save changes and Windows will automatically install the default drivers.
Method 5: Re-install Synaptics
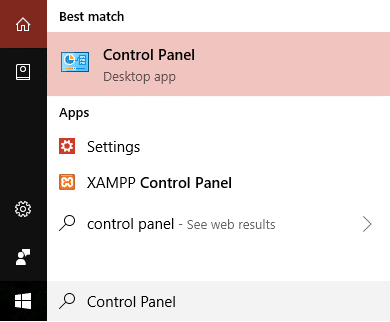
1.Type Control in the Windows Search then click on Control Panel.
2.Then select Uninstall a program and find Synaptics (or your mouse software for example in Dell laptops there is Dell Touchpad, not Synaptics). 3.Right-click on it and select Uninstall. Click Yes if asked for confirmation.
4.Once the uninstallation is complete reboot your PC to save changes. 5.Now go to your mouse/touchpad manufacturer website and download the latest drivers. 6.Install it and reboot your PC. Recommended for you:
Fix This Program Is Blocked by Group Policy Error Fix The exception unknown software exception (0xc0000417) How to Fix Windows Updates Error 0x8024401c Fix NVIDIA Installer Failed Error on Windows 10
That’s it you have successfully Fix Mouse Scroll doesn’t work in Start Menu on Windows 10 but if you still have any question regarding this guide then feel free to ask them in the comment’s section.


