How to Repair Steam on Windows 10
In this section, we have compiled a list of Steam repair tools and arranged them according to user convenience. So, implement these until you find a solution for your Windows 10 PC.
How to Repair Steam on Windows 10 Method 1: Verify Integrity of Game Files Method 2: Refresh Steam Files Method 3: Use Command Prompt to Repair Steam Client Method 4: Use Command Prompt to Modify Settings Method 5: Reinstall Steam
Method 1: Verify Integrity of Game Files
It is essential to verify the integrity of games and game cache to ensure that your game runs on the latest version. The process involves replacing corrupt files in Steam and repairing or replacing these with proper files. This method is a simple fix to the problems associated with Steam games and works for most users. Note: The files saved in your system will not be affected. Although it is a time-consuming process, it is worth a shot, rather than uninstalling the same completely. To verify the integrity of game files, follow the steps mentioned below:
Launch Steam and select the LIBRARY tab.
Now, click on HOME and search for the Game with which you are facing errors.
Then, right-click on the game and select the Properties… option.
Switch to the LOCAL FILES tab, and click on Verify integrity of game files… as depicted below.
Wait for Steam to check game files & download and replace any missing or corrupt files. Lastly, launch the Game and check if the problem is fixed. Also Read: Fix Steam Application Load Error 3:0000065432
Method 2: Refresh Steam Files
For many users, just by refreshing Steam files, they could repair Steam. You can try it too:
- Launch File Explorer by pressing Windows + E keys together.
- Now, navigate to the Steam folder.
- Select all the files using Ctrl + A keys and press Delete, except the two files mentioned below:
Steam.exe executable file Steamapps folder
- Reboot your PC.
- Now, navigate to the Steam folders again
- Double-click on the executable file, Steam.exe to reinstall all the files. Note: Do not open Steam using Taskbar or Shortcut. You will be able to use Steam without any issues once it has been repaired successfully.
Method 3: Use Command Prompt to Repair Steam Client
Here’s how to use commands to repair Steam:
Press the Windows key and type cmd. Then, click on Run as administrator, as shown.
Type the following command in Command Prompt and hit Enter:
Now, launch Steam and check if everything works well. Also Read: How to Fix Steam Not Downloading Games
Method 4: Use Command Prompt to Modify Settings
Alternately, you can enable Kernel Integrity, turn off Kernel Debugging and enable Data Execution Prevention. Here’s how to repair Steam by entering the desired commands:
Close all the tasks in Steam and Exit the application by clicking on the (cross) X icon.
Launch Command Prompt as administrator as instructed in the previous method.
Type the given commands and press Enter after each to enable kernel integrity:
Next, type bcdedit /debug off and hit Enter to disable kernel debugging, as depicted.
Now, to enable Data Execution Prevention (DEP), type bcdedit /deletevalue nx and press the Enter key to execute.
Finally, restart your PC and launch Steam again. Check if the issue is solved. If the problem still persists then, follow the next method on how to repair Steam.
Method 5: Reinstall Steam
This is the last resort if other how-to repair Steam client solutions haven’t worked for you. All glitches and errors associated with a software program can be resolved when you uninstall the application entirely from your system and reinstall it again. Follow the steps listed below to reinstall Steam on Windows 10 PC:
Press the Windows key and type apps. then, hit Enter to open the Apps & features window.
Search for steam in the search this list bar.
Now, select Steam and click on Uninstall, as illustrated below. Note: If the program is already deleted from the system then, you will receive a message, We couldn’t find anything to show here. Double-check your search criteria.
In the Steam Uninstall window, click Uninstall button to remove steam. Now, you have successfully deleted Steam from your system.
Click the link attached here to download Steam.
Navigate to the Downloads folder and open the Steam Setup file.
In the Steam Setup wizard, click on the Next button.
Choose the Destination folder by using the Browse… option and click on Install.
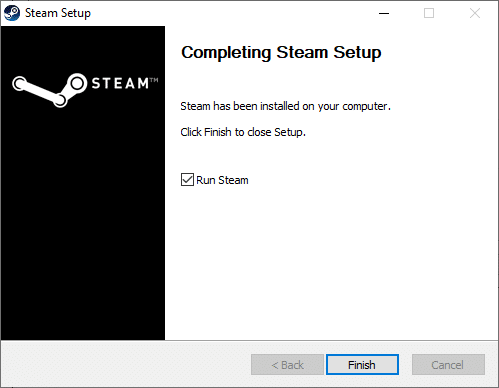
Wait for the installation to be completed and click on Finish, as shown.
Launch a game and check if the issue is fixed now. Recommended
How to Fix Dev Error 6068 How to Download GIF from GIPHY How to Open Steam Games in Windowed Mode How to Change Directory in CMD on Windows 10
We hope that this guide was helpful and you were able to repair Steam Client in Windows 10 and reinstall it if needed. Let us know which method worked for you the best. Also, if you have any queries/suggestions regarding this article, then feel free to drop them in the comments section.


